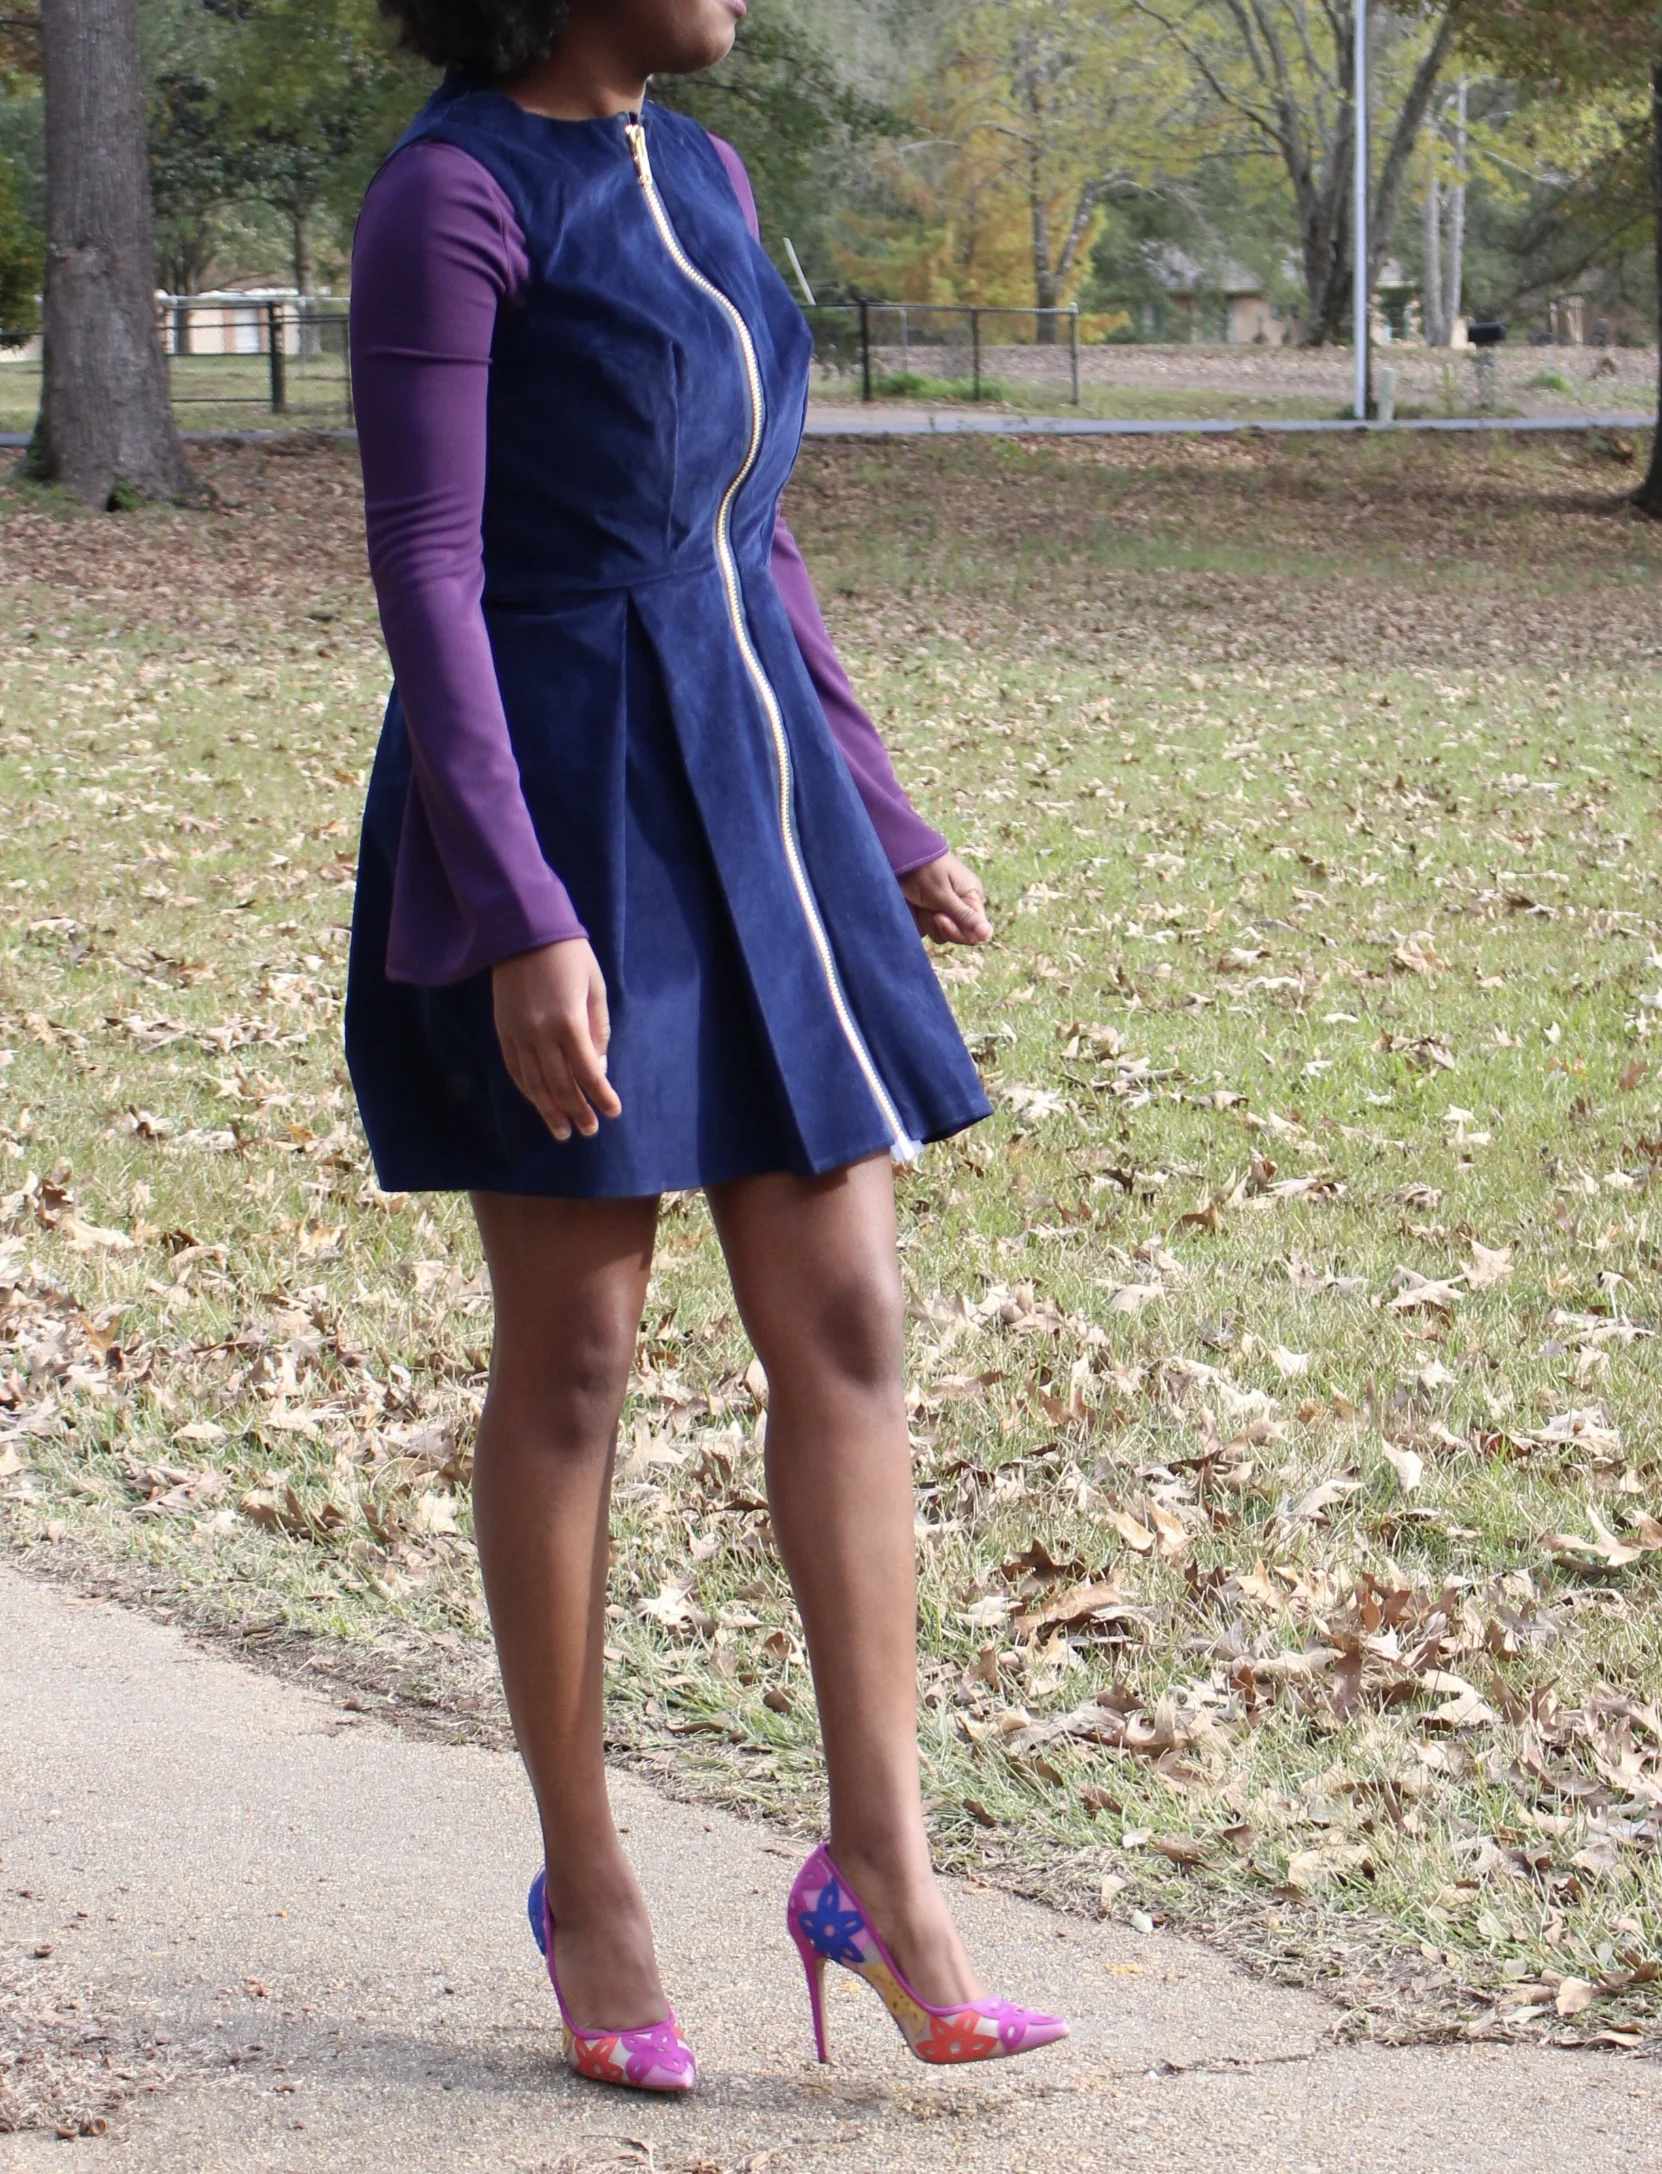
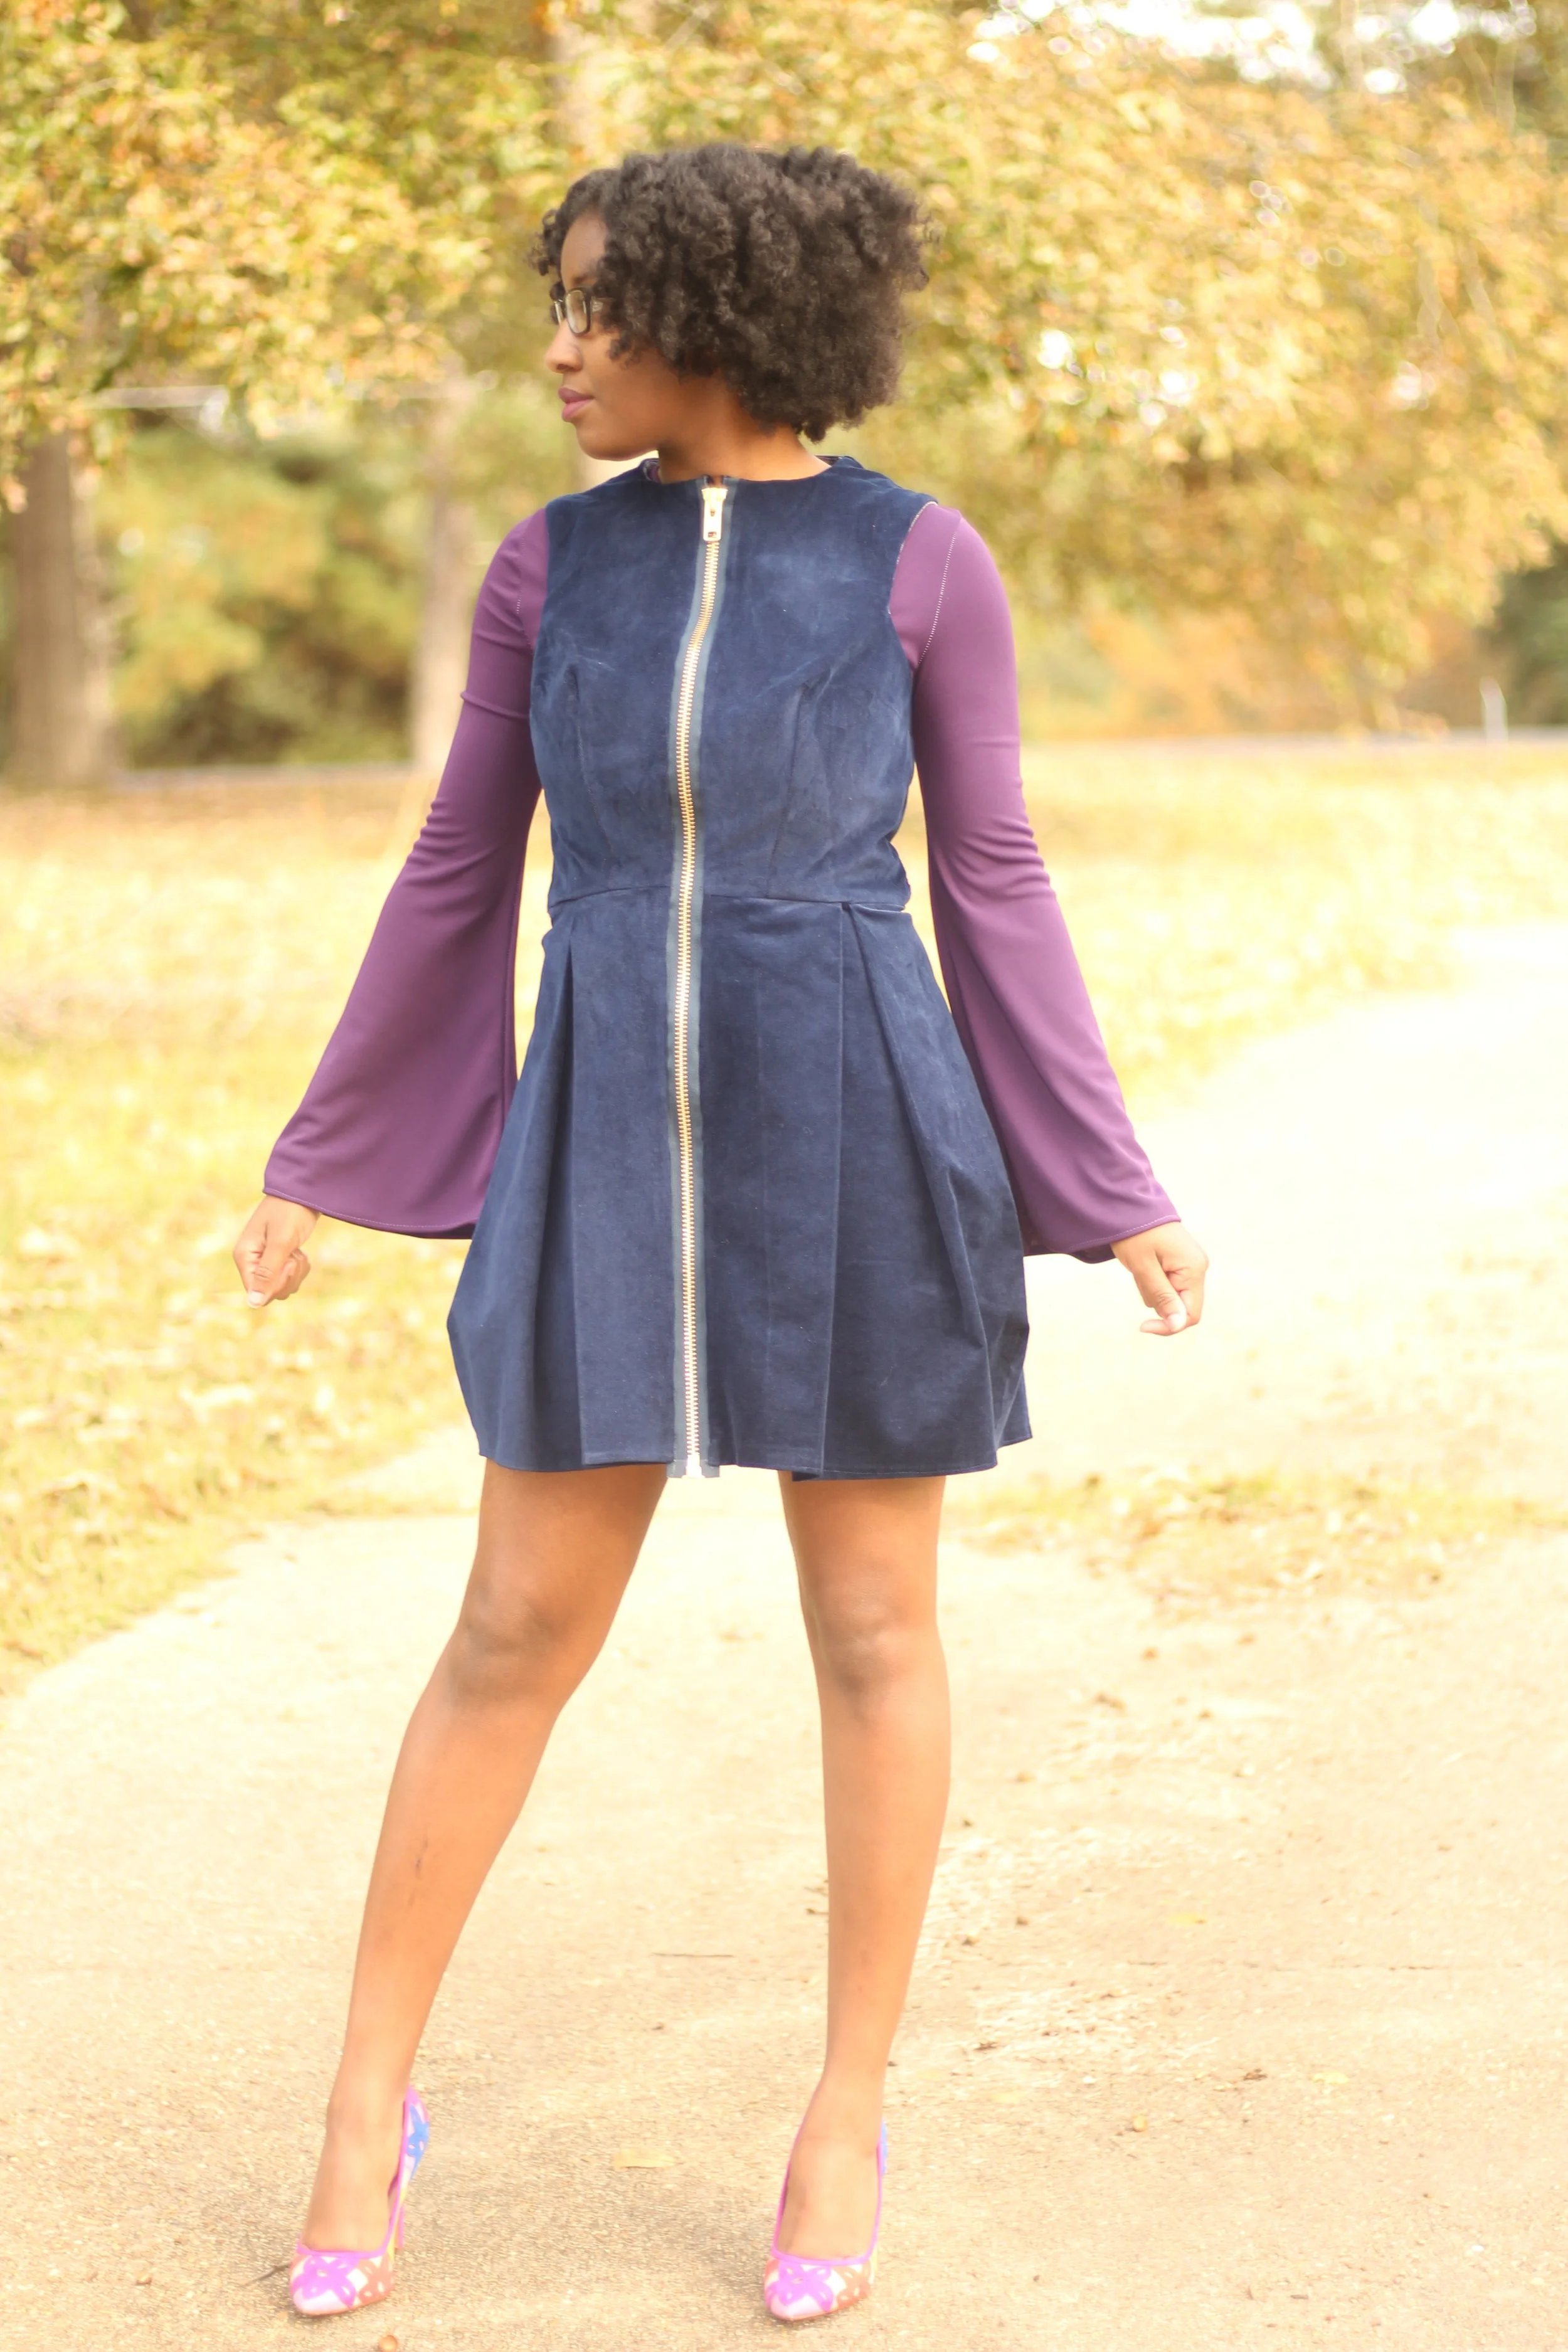
The Peggy Pinafore by Pipe Dream Pattern
I am so excited to finally be able to share this blog post with you all. It has been sitting in my draft folder for about a month, but it is definitely worth the read. I had the opportunity to test Pipe Dream Patterns newest release Peggy Pinafore. It is her last pattern release for this year and I am so excited to share my version. I decided to make version 2, which is a mini skirt combined with a high neck bodice. I figured this version would look good with, or without tights and I own very few mini skirts.
I knew that a full bust adjustment (FBA) would be needed, but I muslined anyway without an adjustment because this was my first experience with this designer. As anticipated, I did have to do a FBA. After I made the adjustment, I made another muslin before cutting into the fabric. I only created a muslin for the bodice since I felt comfortable with the skirts finished measurements printed on the pattern. I figured I could perfect the fit of the skirt as I went along.
The pattern design is pretty straight forward. You will need to use medium to heavy weight fabric to get the tulip shape to hold. The instructions and illustrations are good but I did get a little confused midway into the project. After the lining is attached to the bodice you have to sew up the side seams. The instructions state that the lining and main piece should be pinned and sewn together wrong side facing. However, if your fabric actually has a wrong side this will cause quite a bit of confusion, or at least it did for me. In actuality the main piece and lining should be pinned right side facing and then stitched as one continuous seam. I have included a pictorial below on a miniature mockup of the dress bodice. Other than that, everything else made sense and the illustrations were spot on.


The peggy pinafore is not something I would typically sew, but this design is something I would buy ready to wear (RTW) for a fun event. This is also not a beginner friendly pattern. Simply put any designs with darts mean adjustments may need to be made to get a good fit. However, if you still want to try this out, and you need a good lesson on bust adjustments, check out this class on blueprint.
My finished version is far from perfect. I brought the bust darts up a little too high and the fit is looser in the lower bodice than I would like. I also should have lowered the front neckline a quarter inch or so. But let me tell you what I love about it. I love that the dress is essentially like a jacket because of the separating metal zipper. I love that it is a front zip, easiest dress too put on in my closet at the moment. Last but certainly not least, I love the tulip shape skirt! I paired the dress with a bell sleeve body suit made using Simplicity 8513 and my Jessica Simpson floral pumps. Have you tried Pipe Dream Pattern? If not, go over to her site and check out her designs. I just purchased another Pipe Dream Pattern and I can’t wait to share my version with you all. Until next time, happy sewing!